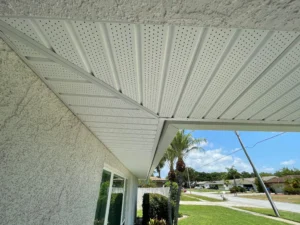
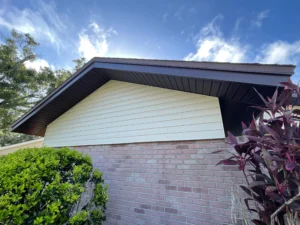
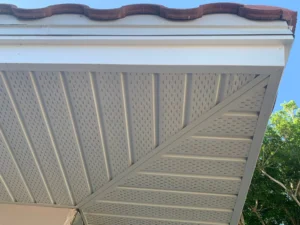
So this is something we ran into on a real project. Two buildings. Both with vinyl siding. And from the outside – honestly, they didn’t look that bad.
But that’s the thing about water damage behind siding. You don’t always see it until you start pulling panels off.
“We have big problems with waterproofing. The vapor barrier – the waterproofing – it was not done properly behind the vinyl siding.”
That’s Ivan, the founder of RIA Construction, speaking directly from the job site. And that one sentence basically explains why this whole project exists. Two buildings. Original siding. Looks normal from the street. Behind it? A waterproofing system that was never installed correctly in the first place.
Let me walk through what we found, what had to happen to fix it, and why this kind of problem is more common than most homeowners realize.
Most homeowners don’t think much about what’s between their siding and their wall. That’s understandable. You can’t see it. The siding looks fine. Everything looks normal.
But the wall assembly behind siding isn’t just framing and sheathing. There’s a layer – the vapor barrier, sometimes called house wrap – that’s supposed to sit between the sheathing and the siding panels. Its job is to let the wall breathe while keeping liquid water out.
When it’s installed correctly, it’s doing a lot of quiet work. Water that gets behind siding panels – from wind-driven rain, from gaps around windows, from any penetration in the exterior – hits that barrier and gets redirected out and away from the structure.
When it’s not installed correctly? Water hits the sheathing directly. And then it just… sits there.
In Florida, with the humidity we deal with, that moisture doesn’t evaporate. It stays. And over time, it starts breaking down whatever it’s touching.
On this project, the scope changed pretty quickly once we started removing panels.
“We replaced all the rots and plywood on the walls.”
That’s the line from the video that tells you how far the damage had gone. It wasn’t just the vapor barrier that needed replacing. The plywood sheathing – the structural layer behind the siding – had rotted. In multiple areas. On both buildings.
So what started as a siding replacement project became a full wall system rebuild on the damaged sections. New plywood. New vapor barrier. New flashing. And then new siding installation on top of all of it.
This is what happens when improper waterproofing gets left in place for long enough. The problem doesn’t stay contained to the barrier layer. It works its way into the structure.
And the siding on the outside? Looked normal. That’s the part that’s hard to explain to homeowners. The surface gives you almost no indication of what’s happening behind it.
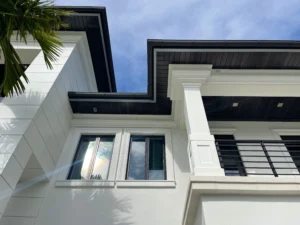
Windows are one of the most common failure points in any exterior wall system. And that was true here too.
When siding panels meet window frames, there has to be a proper transition. Flashing that directs water away from the opening. Sealing that prevents wind-driven rain from finding its way in through the gap. And waterproofing treatment specifically designed for that interface.
“Installing new vapor barrier with a special waterproof windows treatment.”
That’s not standard. Most basic siding installations don’t include specialized window waterproofing. And that’s part of how these problems develop. The window openings – especially on older homes or on buildings where the original installation cut corners – become entry points for water that eventually compromise the wall assembly.
On this project, every window got proper treatment before new trim and siding went on. Because there’s no point in installing a new vapor barrier and new siding if the window transitions aren’t addressed. Water will find its way in through those openings regardless of what else was done correctly.
Here’s the difference between a correct installation and what we found on this project.
A proper vapor barrier is continuous. It covers the full wall surface without gaps. Seams are overlapped correctly and taped. Penetrations – windows, doors, outlets, vents – are flashed and treated individually so water can’t get through the interface between the barrier and those elements.
What gets skipped in a lot of installations is the detail work. The seams don’t get taped. The window openings don’t get flashed properly. The barrier gets torn during installation and not repaired. And then siding goes over all of it, and nobody sees it again for fifteen years.
Until the damage shows up. Either through visible symptoms on the interior, or during a siding replacement project that reveals what’s been happening behind the panels.
That’s what happened here. The original installation left gaps. Water got in. And over years of Florida weather – rain, humidity, heat cycles – the damage compounded.
This part is worth explaining because a lot of homeowners assume they’d know if something was wrong with their exterior walls.
Usually you don’t. Not until it’s fairly advanced.
The siding is sitting in front of the problem. It’s blocking your view of the sheathing, the vapor barrier, the framing. Unless a panel cracks or gets damaged and you happen to look behind it, the damage behind siding is invisible from outside.
Interior signs can show up eventually. Staining on drywall. Soft spots near exterior walls. Mold smell. But those symptoms often develop slowly, and they’re easy to attribute to other causes.
A lot of homeowners on projects like this one had no idea how far the damage had gone until demolition started. And that’s not because they weren’t paying attention. It’s because the exterior surface – the siding – was doing a decent job of hiding everything behind it.
“We’re removing vinyl siding, doing proper waterproofing, vapor barrier, all the flashings on the walls, and then installing new siding.”
That’s the sequence. And it matters that it’s in that order.
You don’t install a new vapor barrier over rotted sheathing. You repair the sheathing first. You don’t flash windows over a damaged wall assembly. You rebuild the assembly and then address the windows.
So on these two buildings, the work happened in layers.
First: remove the old siding. All of it. Not just the obviously damaged sections.
Second: inspect every inch of the wall sheathing. Identify the rotted or compromised sections. Replace them.
Third: install a new, continuous vapor barrier with proper overlapping, taping, and seam treatment.
Fourth: flash and waterproof every window opening with specialized treatment designed for that interface.
Fifth: install new siding over a wall system that’s now actually built correctly.
The palm jack system Ivan mentions in the video – that’s the equipment used to access higher sections of the wall safely. Two-story buildings with multiple wall surfaces require proper staging to do this work correctly. It’s not a detail, it’s part of how the job gets done without cutting corners on access.
If you’re planning a siding replacement project, this video is relevant to you. Because the decision to replace siding isn’t just about the surface material. It’s about what the replacement process reveals.
Any competent siding contractor is going to inspect the wall assembly when old siding comes off. And what that inspection finds determines the real scope of the project.
Sometimes the sheathing is fine and new siding goes on over a solid substrate. That’s the straightforward version.
Sometimes – and this is more common than most homeowners expect, especially on homes that are fifteen or twenty years old – there’s damage behind the old siding that has to be addressed before new material goes on.
The vapor barrier is usually the first thing we look at. Is it continuous? Is it intact? Are the seams and penetrations treated correctly? If the answer is no – and on a lot of older installations, the answer is no – that gets corrected as part of the replacement scope.
Doing siding replacement without addressing a compromised vapor barrier is just siding over a problem. The damage continues. The new siding doesn’t know the difference.
Honestly? In most cases you don’t know until the siding comes off. That’s the problem. Interior signs – wall staining, soft spots near exterior surfaces, persistent moisture smell – can sometimes indicate water intrusion behind siding, but they don’t confirm it. The only definitive way to assess the vapor barrier condition is to remove siding panels and inspect the wall assembly directly. That’s why a proper inspection during any siding replacement project matters. It’s not optional – it’s the only way to know what you’re actually working with.
You can. But it’s not a real repair. If the vapor barrier behind old siding is compromised – gaps, improper seams, damaged sections – and new siding goes on over it without correction, the moisture problem continues. New siding doesn’t stop water from reaching a damaged barrier. It just covers the problem again. The damage behind the wall keeps developing. At some point it shows up as structural damage, interior moisture, or wall system failure. Addressing the vapor barrier as part of the siding replacement is the only way to actually solve the problem, not just delay it.
A few things. Improper installation is the most common – gaps in the barrier, unsealed seams, no proper treatment around window and door openings. In Florida specifically, the combination of heavy rain, wind-driven moisture, and persistent humidity puts a lot of stress on any gap or weakness in the wall assembly. Wind-driven rain during storm season can push water through surprisingly small openings. If the vapor barrier isn’t continuous and properly sealed, water finds those gaps and starts working on the sheathing behind it. Florida’s climate doesn’t give a compromised barrier time to dry out between events – moisture accumulates, and structural damage follows.
It depends on how much is damaged and how far the rot has spread. Replacing a few isolated sections of sheathing adds relatively limited cost to the overall project. Widespread sheathing damage across multiple walls is a different scope – more material, more labor, more time. The honest answer is that you can’t know until the old siding is off and the wall assembly is inspected. What we tell homeowners is that addressing damaged sheathing during siding replacement is always more cost-effective than doing it as a separate project later – or than ignoring it and dealing with the structural consequences further down the road. The staging and labor are already on site. That’s the right time to do it correctly.
m there.